I am so excited to share this fun frame creation I’ve placed in my office, and the story behind it! I love decorating with pictures, and this repurposed giant frame was so fun to create–read the tutorial below.

I’m so excited with how it turned out, and as always, want to share the story along with the process of how this display came to be. For those that know me and my blog a little bit, it should come as no surprise that I like to decorate with portraits of my family around my home. I try to encourage doing the same to my friends in real life, and have aimed to inspire with the Decorating with Portraits series of guest bloggers I had last September and February. I plan to do it again next February. Little by little, I’m making my office a place to inspire me and make me feel happy when I am tapping away on my computer. I love to see the faces of my sweet children staring at me, and occasionally reminding me to get off the computer when they are home, and close my office doors. So, I printed individuals of them in a 10×20 size (done at a pro lab, but you can have them printed at a local lab with white on the side to trim off. Let me start by sharing the exciting BEFORE of this frame.

I saw it in the garage of my neighbor Kelley, and fell in love…with the FRAME! I saw it had amazing potential, with a spray paint can in hand! At one point, she loved this painting, but her husband urged her for years to get rid of it. It sat in her garage until I snatched it up. Squeal! My hubby thought it was a little…inappropriate, and put the black bar across. We got some good laughs out of that one.
Hubby thought the dark brown stain was lovely, and that it didn’t need a paintin’ but I thought otherwise. My friend Alisha helped me with some measuring, that’s not so much my favorite part of a project.

I just stapled the yellow fabric to the wall. Staples leave really small holes, you know. Alisha may or may not have chipped her tooth when she tried to wiggle a jammed staple out of the stapler. I mounted the 10×20 prints onto foam board with Elmers spray glue, then cut them out.

I glued ribbon on the back of the foam board, and put push pins in the wall, and they hung quite simply. And here they are propped up staring at me with the sweetest faces!

The view from my yellow desk (that hubby built) and the tin foil table that I recently constructed.
I always love a side by side before & after…

It’s hard to tell how large the frame is without a model standing next to it, so here ya go!

I just love it, and my office is really coming together! Now go rummage through the thrift store looking for great frames. I actually using the inside giant canvas for another fun project, check it out! Happy Repurposing!
You might also like:
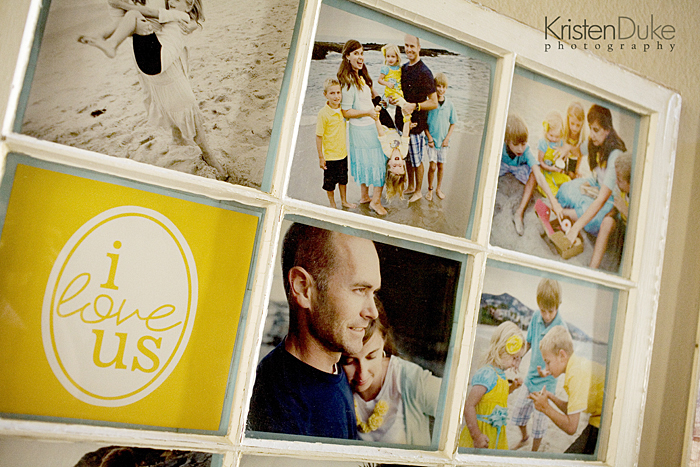
How to turn Vintage Windows into Picture Frames